
A copy stand might seem boring, but it’s the secret to making your reproduction photos look professional and expensive. It provides a stable platform for your camera, ensuring sharp, consistent images. Proper lighting, camera positioning, and focus are essential for accurate color and detail. Investing time in setting up your copy stand correctly can transform ordinary shots into impressive, high-quality results. Keep exploring to discover how to optimize your setup and truly elevate your photography.
Key Takeaways
- A stable, well-aligned copy stand ensures sharp, professional-quality images that mimic expensive reproductions.
- Proper lighting setup with adjustable, daylight-balanced lamps minimizes shadows and glare for vibrant results.
- Precise camera positioning and focus are crucial for capturing fine details and true colors.
- Using macro or prime lenses with high depth of field enhances clarity and reduces distortion.
- Investing time in setup and adjustments dramatically elevates the perceived quality of reproduction photographs.
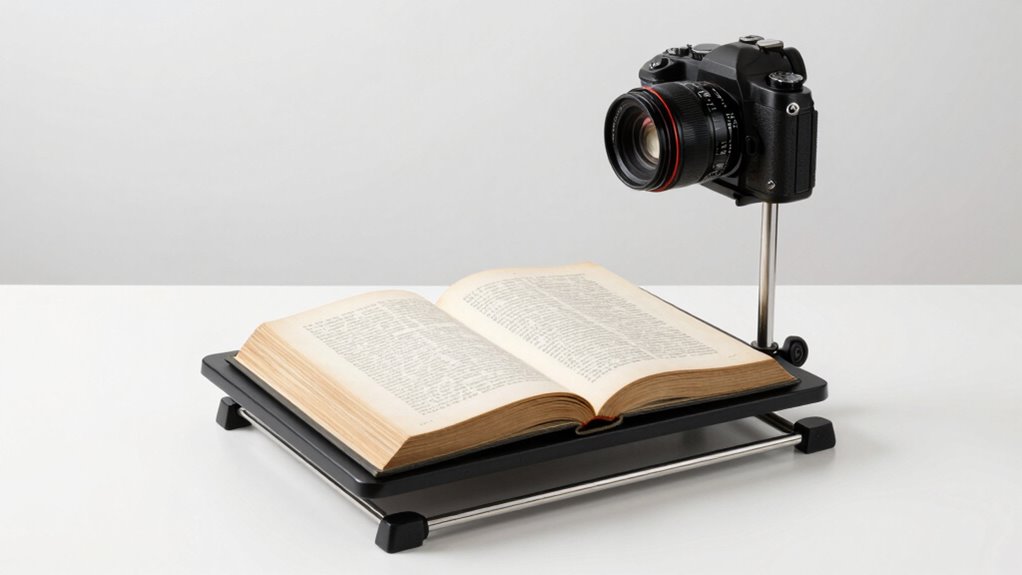
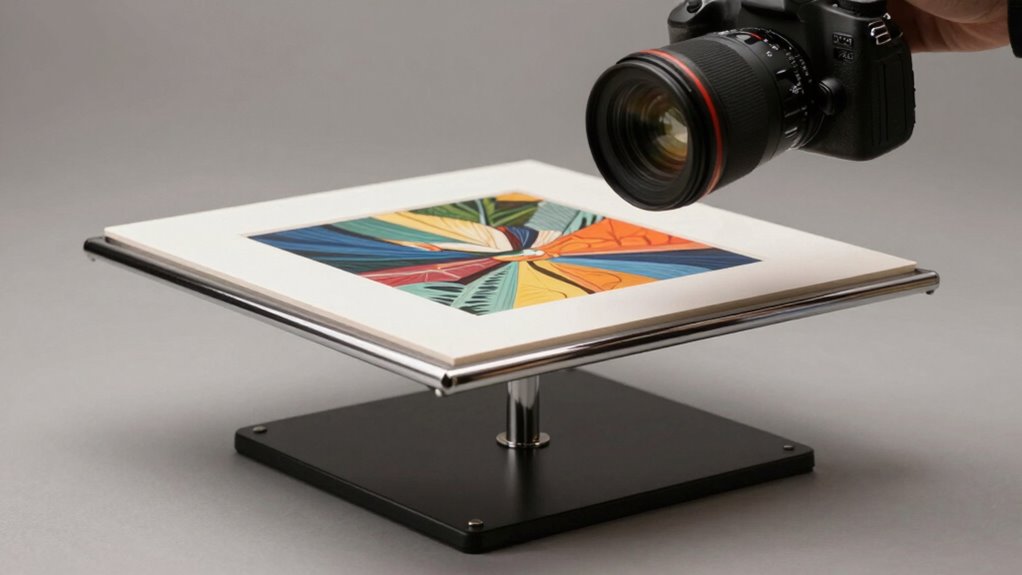
A copy stand is an essential tool for anyone looking to digitize documents, photographs, or artwork with precision. It provides a stable platform that keeps your items perfectly still while you capture high-quality images. When setting up your copy stand, two critical elements come into play: lighting setup and camera positioning. Mastering both ensures your reproductions look professional and, surprisingly, expensive.
A copy stand with proper lighting and camera alignment ensures professional, high-quality reproductions of your artwork or documents.
The lighting setup is where many beginners stumble. You want consistent, even illumination that minimizes shadows and glare. Think about using adjustable lamps with daylight-balanced bulbs. Position these lights at 45-degree angles on either side of your artwork or document, aiming to flood the subject evenly. This setup helps eliminate harsh shadows and highlights details without creating distracting reflections. If your items are glossy or reflective, consider diffusing the light with softboxes or white umbrellas. This softens the light further, producing a clean, consistent background that enhances the overall quality of your scan or photograph.
Next, you need to focus on camera positioning. The camera should be mounted directly above your subject, aligned perfectly parallel to the surface. This alignment ensures that the image is sharp across the entire frame and maintains true proportions. Use the adjustable arm of your copy stand to raise or lower the camera, finding the optimal height that captures your entire object without cutting off edges. Lock the camera in place to prevent any accidental shifts during the shot. When positioning, also pay attention to your lens choice; a macro or a prime lens with minimal distortion works best for detailed reproductions. Set your camera to a low ISO to reduce noise, and use a small aperture (high f-stop number) to maximize depth of field, ensuring every part of your document or artwork is in focus.
Once your lighting setup and camera positioning are dialed in, take test shots and review them carefully. Adjust the lights for even brightness and tweak the camera height or angle as needed. Small changes can make a significant difference in the final image quality. Remember, the goal is to replicate the original as accurately as possible, with crisp details and true colors.
In the end, investing time into perfecting your lighting setup and camera positioning turns what might seem like a simple tool into a powerhouse for professional-looking reproductions. It’s often these seemingly “boring” details that elevate your images from average to extraordinary, making your reproductions look as if they were produced in a high-end studio.
Frequently Asked Questions
Can I Use a Copy Stand With My Smartphone?
Yes, you can use a copy stand with your smartphone. Many copy stands are smartphone-compatible, featuring adjustable mounts or universal holders that fit various models. You might also want to explore accessory options like smartphone clamps or tripod adapters to guarantee a secure fit. This setup helps you achieve steady, high-quality reproduction photos, making your smartphone a versatile tool for detailed, professional-looking images without needing expensive equipment.
What Lighting Is Best for Product Photography?
You should use soft, even studio lighting or natural light for product photography. Studio lights like softboxes or ring lights create consistent, flattering illumination that highlights your product’s details. Natural light, especially during golden hour, provides a warm, inviting glow. Avoid harsh shadows by diffusing light sources, and position your product to maximize the light’s effectiveness. Combining both options can give you professional-looking results that make your products stand out.
How Do I Prevent Glare on Shiny Objects?
Oh, glare on shiny objects? Just love to see your reflection, right? To reduce glare, use diffuse lighting or softboxes to soften surface reflection. Position lights at angles that minimize direct reflection into your camera lens. You can also add a polarizing filter—it’s like magic for glare reduction. Keep experimenting with light angles, and you’ll find the perfect setup to tame those shiny surfaces and make your photos pop.
Are DIY Copy Stands Effective?
DIY copy stands can be effective if you’re on a budget and seeking artistic versatility. They allow you to customize your setup and experiment with different angles or lighting. However, they may lack the stability of professional options, which could impact image quality. Compared to buying a ready-made copy stand, DIY solutions are more cost-effective but might require extra effort to achieve professional results.
What Maintenance Is Required for a Copy Stand?
You need to regularly check your copy stand for camera stability and alignment accuracy. Tighten any loose screws and make sure the vertical and horizontal supports are secure. Clean the platform and lens area to prevent dust from affecting image quality. Periodically calibrate the setup to maintain alignment, especially after moving it. Proper maintenance keeps your repro photos sharp, consistent, and professional-looking, saving you time and effort in the long run.
Conclusion
Once you start using a copy stand, you’ll see your photos transform from dull to stunning, like turning a rough sketch into a polished masterpiece. I once struggled to capture jewelry’s detail, but with a simple stand, my shots became crisp and professional-looking. Just like a sturdy easel elevates an artist’s work, a copy stand elevates your photography—making even the most “boring” objects look expensive and impressive. It’s the secret to effortless, high-quality images.