If your drafting table feels “off,” it’s likely due to poor ergonomic setup or inadequate lighting. You might be sitting at an incorrect height, causing discomfort and reducing focus, or the lighting could be causing eye strain. Adjusting your chair and table height for proper posture, ensuring your workspace is well-lit with natural or adjustable light, can make a big difference. For simple tips on optimizing your workspace, keep exploring how to improve your setup effectively.
Key Takeaways
- Ensure your drafting table is at the correct height so your elbows form a 90-degree angle during work.
- Adjust lighting to reduce glare and shadows, ideally using natural light or a daylight-balanced task lamp.
- Check that your chair and foot positioning support proper posture, with feet flat and back supported.
- Clear clutter and maintain a clean workspace to minimize distractions and improve focus.
- Verify that your drawing surface is level and stable to promote comfortable, precise work.

Have you ever sat down at your drafting table only to feel that something’s just not right? Maybe your posture feels awkward, or your eyes strain more than they should. The truth is, your drafting experience can be considerably impacted by small but essential adjustments. Often, the solution is simpler than you think, involving a few ergonomic tweaks and lighting optimization. When these elements are off, even the most talented artist or designer can feel frustrated and less productive.
First, consider your ergonomic setup. If your drafting table isn’t adjusted to suit your body, it can cause discomfort and hinder your focus. Your chair height, the angle of the table, and the position of your supplies all matter. You want your elbows to rest comfortably at a 90-degree angle when working, your feet flat on the floor, and your back supported properly. If your table is too high or too low, it can lead to tension in your shoulders, neck, and wrists. Making ergonomic adjustments—such as raising or lowering your chair, using an adjustable drafting table, or adding support cushions—can drastically improve your comfort. When you’re physically comfortable, your concentration and precision naturally improve.
Lighting optimization is equally essential. Poor lighting can cause eye strain, headaches, and fatigue, making your work feel off even if your posture is perfect. Natural light is best, so position your table near windows if possible. But since daylight isn’t always enough or consistent, invest in a high-quality adjustable task lamp. Position it so that the light falls evenly across your work surface without creating glare or shadows. Use bulbs with a color temperature around 5000K—similar to daylight—to reduce eye strain and enhance color accuracy. Avoid harsh, overly bright lights or overly dim environments, as both can be distracting and tiring. Proper lighting helps your eyes focus better, reduces fatigue, and ensures your sketches and designs look true to life. Additionally, choosing sulfate-free products for your tools and workspace can help maintain a clean, safe environment conducive to focus and comfort.
In essence, feeling that “off” sensation at your drafting table often comes down to these simple adjustments. Ergonomic tweaks ensure your body stays comfortable and free from strain. Lighting optimization keeps your eyes relaxed and your work true to color. Both elements work together to create an environment where your creativity can flow freely without physical or visual distractions. Take the time to evaluate your setup—adjust your chair, table, and lighting—and you’ll notice a remarkable difference in how your workspace feels. When your environment supports your body and eyes, your focus and output will naturally improve, making that “off” feeling a thing of the past.

Yaheetech Adjustable Drafting Table Art Desk, Storage Drawers & Stool, Wood
- Adjustable Table Height: 47.4×23.6x(27.4-36.4) inches
- Tilt Angle Range: 0-60 degrees for versatile use
- Easy Angle Adjustment: Smooth, tested adjustment system
As an affiliate, we earn on qualifying purchases.
As an affiliate, we earn on qualifying purchases.
Frequently Asked Questions
Can I Fix My Drafting Table Without Professional Help?
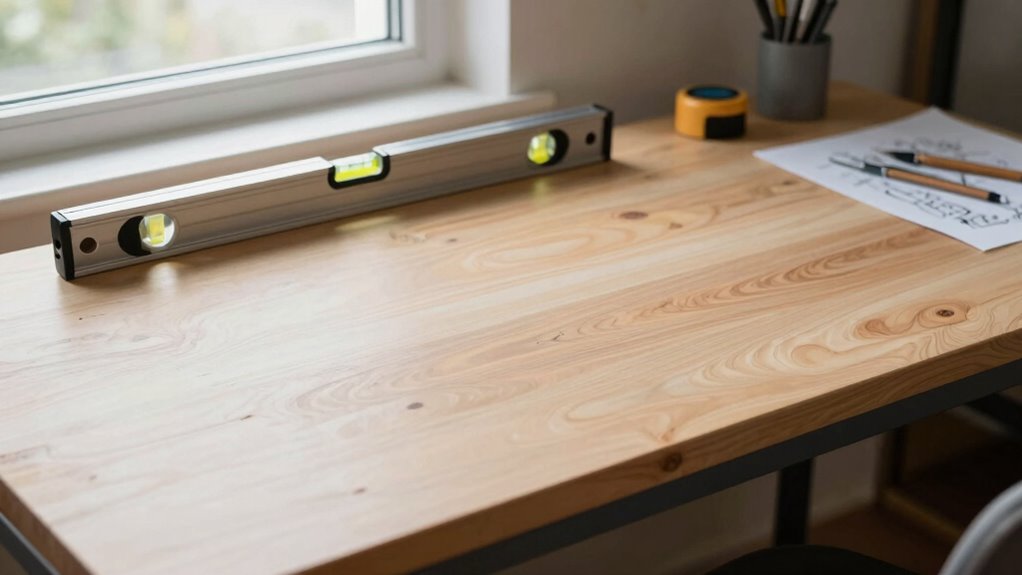
Yes, you can fix your drafting table yourself by doing DIY adjustments. Start by identifying common problems like uneven surfaces or wobbly legs. Use a level to check the surface and tighten loose screws or bolts. If needed, sand down any rough spots or add shims for stability. With some basic tools and patience, most issues can be resolved without professional help, making your drafting table feel like new again.
What Tools Do I Need to Adjust My Drafting Table?
To adjust your drafting table, you’ll need a set of basic adjustment tools like a wrench, screwdriver, and Allen keys. Grab a level for precise alignment, and keep some lubricant handy for smooth movement. Follow simple maintenance tips—tighten loose screws, check hinges, and clean surfaces regularly. These tools are all you need for a quick fix, making your table feel just right again without professional help.
How Often Should I Check the Stability of My Table?
You should check the stability of your drafting table at least once a month. Regular table maintenance ensures it stays level and secure, preventing any wobbling or shifting that could compromise your work. During your stability check, tighten any loose screws, inspect for wobbling, and verify the surface remains flat. Making this routine part of your workspace upkeep keeps your drafting table reliable and your projects precise.
Are There Safety Concerns When Fixing a Drafting Table?
Safety precautions matter when fixing your drafting table, so don’t cut corners. Always unplug the table before maintenance, wear gloves and eye protection, and work in a well-ventilated area. Follow maintenance tips carefully, like tightening loose screws and checking stability regularly. If unsure about any step, consult a professional. Remember, better safe than sorry—taking these precautions keeps your workspace secure and your table in top shape.
Will Tightening the Screws Affect the Table’s Surface?
Tightening the screws won’t harm your table’s surface, and it actually improves surface stability. As you tighten the screws, they secure the parts more firmly, preventing wobbling or unevenness. Just be careful not to overtighten, which could cause damage or warping. Keep the screws snug but not overly tight, and you’ll notice a more stable, level surface that makes your drafting work easier and more precise.

Daylight Company Lumi Task Lamp,+95 CRI, 4000 Lux,Craft Light, Super Bright Desk Lamp, Touch Dimmable, 2 Brightness Levels, Ideal Table Light, Drawing Lamps – Metal – 15 W
- Long Reach and Adjustable Head: 100 cm flexible, multi-position arm
- Suitable for Various Environments: Ideal for reading, crafting, and work
- Large Shade with 2 Brightness Levels: Adjustable shade, 3800 Lux at 30cm
As an affiliate, we earn on qualifying purchases.
As an affiliate, we earn on qualifying purchases.
Conclusion
Remember, a small fix can make a big difference. If your drafting table feels “off,” don’t overlook the simple solutions like adjusting the height or leveling the surface. Sometimes, it’s the little things that make all the difference in your work and comfort. As the saying goes, “A stitch in time saves nine.” Tackle the problem now, and you’ll enjoy a smoother, more enjoyable drafting experience every time.

Synorla Ergonomic Tall Drafting Chair-Mesh Desk Chair with Flip-Up Arms
- Ergonomic Design: Suitable for drafting and office desks
- Adjustable Height: Max 9-inch seat height adjustment
- Flip-up Armrests: Customizable armrest positioning
As an affiliate, we earn on qualifying purchases.
As an affiliate, we earn on qualifying purchases.

MEEDEN White Adjustable Drafting Table: 35.5" x 23.5" Art Drawing Desk with Height Adjustment – Solid Beech Wood Craft Painting Table – Large Tilting Table for Adults Artists Writing Working
- STURDY AND DURABLE: The drafting table is made…
- ADJUSTABLE HEIGHT & TABLETOP. MEEDEN wood art table's…
- MULTIPLE USES: The high quality drawing desk…
As an affiliate, we earn on qualifying purchases.
As an affiliate, we earn on qualifying purchases.