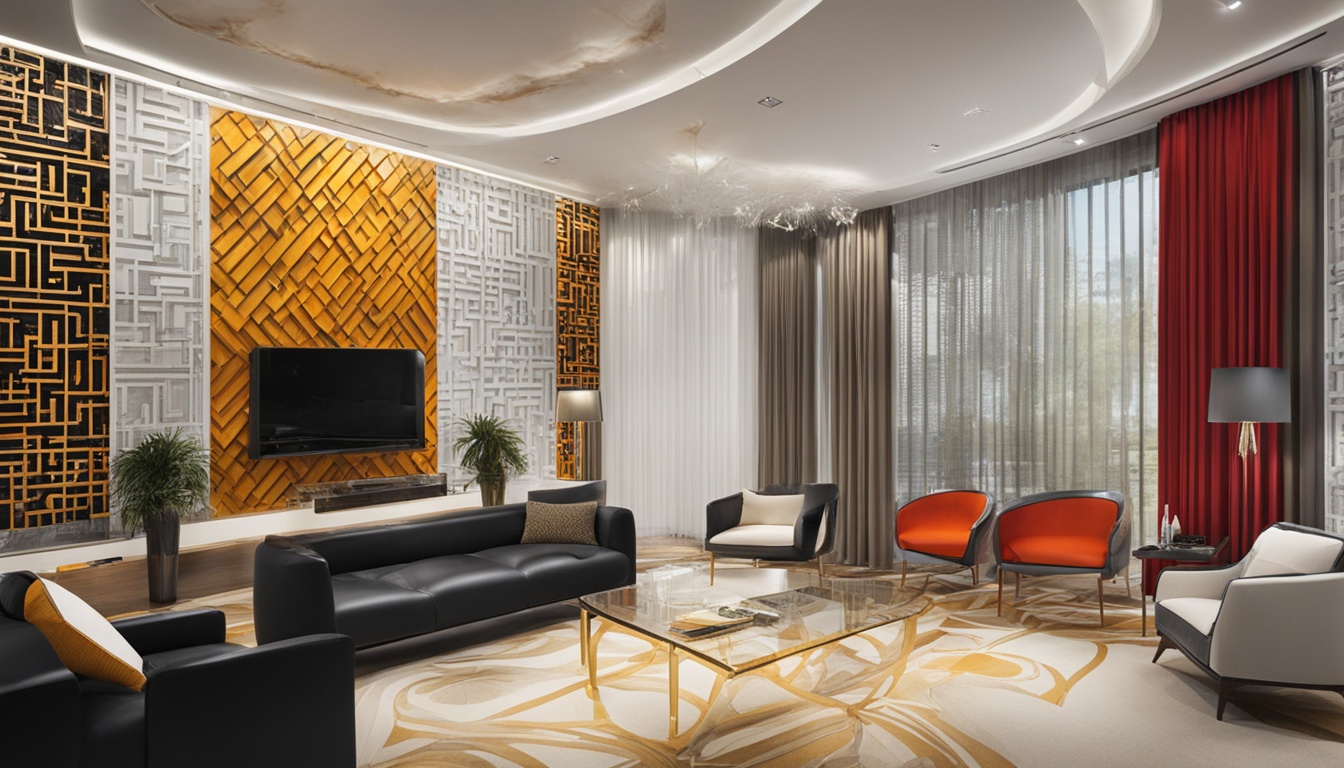
To organize your interior design materials effectively, start by creating a materials library. Categorize samples by type, such as fabric, flooring, and paint, and use labeled, transparent bins for easy access. Implement sample binders for smaller swatches and consider vertical storage for larger items. Regularly update your inventory to keep it relevant, removing outdated samples promptly. Utilize project management tools to track materials and enhance your workflow. Organizing materials not only boosts creativity but also enriches client presentations. If you're looking for more tips and tricks to refine your organizational strategy, you're in for a treat! When it comes to incorporating wood in interior design, it’s essential to have a variety of wood samples on hand in your materials library. Consider organizing these samples by wood type, finish, and stain to make it easy to find the perfect match for your design projects. Having a well-organized collection of wood samples will not only streamline your design process but also impress clients with the level of detail and thoughtfulness you put into your work.
Key Takeaways
- Organize samples by material type (fabric, flooring, paint) and use clear, labeled storage solutions for easy access and visibility.
- Implement a color-coded bin system to streamline retrieval and enhance workflow efficiency during projects.
- Conduct quarterly inventory checks to remove outdated samples and maintain a relevant materials library.
- Use project management tools to track materials and collaborate efficiently with clients and team members.
- Enhance client presentations by organizing materials visually and using storytelling techniques to engage and clarify design choices.

EVEO Screen Cleaner Spray - Large Screen Cleaner Bottle - TV Screen Cleaner, Computer Screen Cleaner, for Laptop, Phone, Ipad - Computer Cleaning kit Electronic Cleaner (1 Pack)
Screen Cleaner is Your Screen’s New Bestfriend! - EVEO is proud to present a screen cleaner that’s perfectly...
As an affiliate, we earn on qualifying purchases.
Importance of a Materials Library
A well-organized materials library is essential for any interior designer looking to boost creativity and efficiency. It serves as a central resource where you can explore a diverse range of interior design materials, from fabric swatches to paint samples. By having everything in one place, you can easily gather inspiration and consider various options for your projects.
An organized materials library not only enhances creativity but also greatly impacts your workflow. When everything's neatly categorized, you'll spend less time sourcing samples and more time focusing on design. This efficiency can lead to increased profitability as you can take on more projects without sacrificing quality.
Moreover, having tangible materials at your fingertips improves client presentations, fostering satisfaction and trust in the design process. When clients can see and feel the materials you propose, it creates a more engaging and convincing experience.
Regularly updating and maintaining your materials library keeps it relevant and encourages continual exploration among your team. By investing time in organizing your materials library, you're setting yourself up for success in your interior design endeavors.

iO CLEAN Screen Cleaner Spray (16oz - 473ml) – Best Large Cleaning Kit
Screen cleaner spray and cloth. Screen cleaner spray and cloth are designed for high-end devices and work flawlessly...
As an affiliate, we earn on qualifying purchases.
Organizational Strategies for Samples

When organizing your design samples, start by categorizing them by material type, like fabric, flooring, and paint.
Use efficient storage solutions, such as labeled bins or folders, to keep everything easily accessible.
This way, you can streamline your workflow and quickly find the materials you need for each project.
Categorization by Material Type
Organizing your interior design materials by material type can greatly enhance your workflow and decision-making process. Start by categorizing your project materials into clear groups, such as fabrics, flooring, paint, wallpaper, and other construction materials.
For fabric samples, sort them by end-use categories like upholstery, drapery, and outdoor, and then further by color for quick access during projects. Consider incorporating unique cultural experiences from Island Getaways to inspire your color choices and material selections.
When it comes to flooring samples, group them by type—hardwood, tile, or carpet—and arrange them by tone. Store larger samples flat or hanging to avoid damage.
Paint samples should be organized in binders by color temperature and vendor, making it easier to reference fan decks for cohesive color palettes.
For wallpaper samples, flat-file drawers work best; categorize them by type (pasted or removable) and color for streamlined selection during client presentations.
Efficient Storage Solutions
To maximize efficiency in your interior design workflow, implementing smart storage solutions for your samples is crucial. Start by utilizing clear storage bins labeled for quick identification and accessibility. Organize them by project or room category, allowing you to retrieve materials efficiently during design phases.
For larger samples, like tiles and carpets, vertical storage racks are a game-changer. They maximize space while keeping samples easily viewable and accessible.
Consider creating color-coded bins for different types of materials—such as fabrics, paints, and hardware. This strategy not only streamlines the selection process but also enhances visual organization, making it easier to quickly find what you need.
Additionally, incorporate sample binders for smaller swatches and paint chips. These binders allow for easy viewing and transport, and you can organize them by color, type, or vendor.
Lastly, don't forget to regularly review and update your storage solutions. Discard outdated materials and integrate new samples that reflect current design trends. By doing this, you'll guarantee your collection remains relevant and your workspace stays efficient.

Screen Cleaner Spray 16oz (4oz x 4 Pack) - TV & Computer Screen Cleaner with 2 Microfiber Cloths for Multiple Devices
Quality Screen Care Kit: The kit includes 4 bottles of tv screen cleaner for smart tv and 2...
As an affiliate, we earn on qualifying purchases.
Efficient Storage Solutions

Efficient storage solutions can transform your interior design workspace into a functional haven. By implementing smart organizational strategies, you'll enhance your ability to manage materials, making your design projects smoother and more enjoyable.
Here are three effective methods to contemplate:
- Clear, Labeled Bins: Use transparent bins for your sample library to boost visibility and accessibility. This way, you can quickly find the materials you need during a project without rummaging through clutter.
- Vertical Storage Racks: For larger samples like tiles and carpets, vertical storage racks maximize your space. They keep your materials organized while freeing up floor area, allowing for easier navigation in your workspace.
- Color-Coded Bin System: Create a color-coded system to categorize materials by type, such as fabrics, paints, and hardware. This strategy streamlines retrieval, making it simple to grab what you need when organizing an interior design project.
Regularly assess and update these efficient storage solutions to guarantee they meet your evolving needs and reflect current design trends.
This proactive approach will keep your workspace both functional and inspiring.

JanSport Cool Backpack, with 15-inch Laptop Sleeve - Large Computer Bag Rucksack with 2 Compartments, Ergonomic Straps, Black
The most trusted name in backpacks - every Jan sport comes with a lifetime. Carry your Jan sport...
As an affiliate, we earn on qualifying purchases.
Categorizing Different Material Types

When you categorize your interior design materials, think about how each type serves its purpose.
Organizing fabric samples by end-use, flooring by type, and paint and wallpaper by color can make a big difference in your workflow.
This approach not only streamlines selection but also enhances your overall design process.
Fabric Organization Techniques
Organizing fabric samples can feel overwhelming, but categorizing them by end-use makes it much simpler. Start by dividing your fabrics into three primary categories: upholstery, drapery, and outdoor. This targeted approach guarantees you can easily access the materials you need for specific projects.
Once you've established your categories, it's time to organize by color. This step is essential, as it allows for quick visual matching with other design elements, streamlining your selection process.
To keep everything neat and accessible, consider these storage solutions:
- Labeled Bins: Use clear bins to store fabric swatches, making it easy to identify contents at a glance.
- Folders: Organize swatches in labeled folders, which helps maintain cleanliness while allowing for efficient retrieval.
- Heavy Shelving: Choose sturdy shelving for larger samples to prevent damage, guaranteeing your collection remains in top shape.
Flooring Sample Storage
Categorizing flooring samples by material type not only simplifies your selection process, but it also enhances your presentations to clients. Begin by sorting your samples into distinct categories like hardwood, laminate, vinyl, and tile. From there, further organize them by tone or finish to facilitate quick access during design decisions.
Utilize deep shelving units or vertical storage racks to display larger flooring samples, ensuring they're easily visible and accessible for review. Label each sample with essential details such as material type, color, price per square foot, and manufacturer. This practice streamlines the selection process and aids in inventory management, making project management more efficient.
To maintain a relevant library, regularly update your flooring samples by removing discontinued options and incorporating new releases that reflect current trends. Additionally, consider grouping samples by room type—kitchen, bathroom, living room—to enhance workflow efficiency during project development.
An organized interior design space not only saves you time but also showcases your professionalism, making it easier for clients to envision their ideal spaces. By implementing these categorization techniques, you'll improve both your design process and client interactions.
Paint and Wallpaper Categories
After sorting your flooring samples, it's time to tackle paint and wallpaper categories, which are just as important for a well-rounded design library.
Organizing these materials effectively can streamline your design process and enhance client consultations.
- Categorize Paint Samples: Use binders to sort paint samples by color temperature. This allows for quick reference when selecting hues for specific projects. Additionally, use fan decks to group paint options based on finish types like matte, satin, and gloss.
- Store Wallpaper Samples: Keep wallpaper samples in flat-file drawers, organized by type—such as pasted or removable—and sorted further by pattern or color. This guarantees efficient retrieval and a neat presentation for clients.
- Implement a Labeling System: Establish a clear labeling system for both paint and wallpaper categories. This makes it easier for you and your team members to locate materials quickly, saving time during the design process.
Regularly update your inventory to reflect current trends and remove outdated styles. This keeps your collection relevant and ready for any design project that comes your way.
Maintaining Sample Relevance

Maintaining sample relevance is essential for any interior designer looking to stay ahead of industry trends. To achieve this, you should conduct regular inventory checks every quarter. These checks help you identify and remove discontinued or outdated samples, ensuring your collection remains current.
Establish a consistent schedule for reviewing materials and hold vendor meetings to stay informed about new releases and updates in the industry.
Implement a systematic approach for discarding unnecessary samples by creating a discard bin for items that haven't been used in recent projects or that don't align with your current design focus. This keeps your workspace uncluttered and focused on what truly matters.
Additionally, encourage client feedback on sample selections during presentations. This feedback can refine your collection based on what resonates with your target audience.
Consider maintaining an "inspired basket" where you can store new materials and ideas for potential future projects. This allows you to explore fresh concepts without overcrowding your main sample library.
Security and Privacy Considerations

In today's digital age, prioritizing security and privacy in your interior design practice is vital to protect your creative assets and client information.
Implementing strong security measures not only safeguards proprietary materials but also builds trust with your clients.
Here are three key steps to enhance your security and privacy protocols:
- Secure Storage Solutions: Use locked cabinets for physical client files and password-protected digital files for proprietary materials. This guarantees that sensitive information remains confidential.
- Regular Backups: Backing up your digital resources regularly is essential. This practice prevents data loss and maintains the integrity of your material libraries, allowing you to recover quickly in case of any unforeseen issues.
- Access Policies and Audits: Establish clear policies regarding material usage and access. Ascertain only authorized personnel can interact with sensitive information.
Conduct periodic audits of access logs to identify any potential security breaches and maintain high privacy standards.
Tools for Project Management

Effective project management is essential for the success of any interior design endeavor. Utilizing project management software like Houzz Pro or Asana helps you track materials, deadlines, and client communications, enhancing your overall workflow efficiency. Digital tools such as Trello and Monday.com allow you to create visual boards for each project, making it easy to organize tasks, materials, and timelines in one accessible location.
To further streamline your process, consider using cloud-based storage solutions like Google Drive or Dropbox. These platforms facilitate easy sharing and collaboration on project materials, ensuring that team members and clients have real-time access to important documents. Additionally, mobile apps for project management like Notion or ClickUp empower you to manage samples and project details on-the-go, increasing your flexibility during site visits or client meetings.
Here's a quick overview of some valuable tools:
| Tool | Purpose | Benefits |
|---|---|---|
| Houzz Pro | Project management software | Tracks materials and deadlines |
| Trello | Visual task boards | Organizes tasks visually |
| Google Drive | Cloud-based storage | Shares documents easily |
| Notion | Mobile app for project management | Manages details on-the-go |
| Asana | Project management software | Enhances workflow efficiency |
Enhancing Client Presentations

To enhance your client presentations, focus on visual appeal and impact that capture attention right away.
Streamlining material selection and using effective communication techniques will help you convey your design vision clearly.
With the right organization, you'll not only impress clients but also instill confidence in their choices.
Visual Appeal and Impact
Organizing your interior design materials by type and color not only enhances visual appeal but also creates a striking presentation that resonates with clients.
When your samples are carefully curated, it demonstrates professionalism and attention to detail, making a lasting impression.
To elevate your presentations, consider these three strategies:
- Utilize Clear Bins: Store materials in transparent bins for quick access and visibility. This organization method helps you showcase your samples effectively without unnecessary clutter.
- Create Sample Binders: Use categorized binders to keep your materials organized. This allows you to tell a cohesive story during presentations, guiding clients through your design concept effortlessly.
- Maintain a Digital Board: Incorporate digital tools to display your materials. This enhances visual appeal and helps clients visualize the overall design, fostering deeper engagement.
Streamlined Material Selection
When you streamline material selection, you not only enhance the efficiency of your presentations but also improve client satisfaction. By organizing your materials by category—like fabrics, paints, and flooring—you expedite the selection process, making it easier for clients to make quick decisions. This organization is essential for interior designers who want to showcase stunning designs effectively.
Additionally, understanding the importance of creating unique experiences, as seen in luxury retreat development, can inspire your material selection process to be more aligned with client desires.
Utilizing clear storage bins and labeled boxes enhances the visibility and accessibility of your samples. When clients can easily see and touch materials, it elevates the professionalism of your presentation. Implementing a color-coded system for sample books helps you match materials to client preferences swiftly, reducing the time spent searching for compatible options.
Regular inventory checks guarantee you're only presenting relevant and trendy samples, keeping your client meetings focused and impactful. Additionally, incorporating digital tools like virtual sample boards can create a visually engaging experience, helping clients better visualize their design choices.
Effective Communication Techniques
How can effective communication transform your client presentations? By mastering this skill, you can elevate your organization of interior design materials and truly connect with your clients.
Here are three key techniques to enhance your presentations:
- Visually Appealing Sample Boards: Create curated sample boards that showcase materials aligned with your client's vision. This not only enhances their understanding but also fosters an emotional connection to the design.
- Storytelling Techniques: As you present, explain your design choices and material benefits. Share how each element contributes to both the aesthetic and functionality of the space, making the presentation more engaging.
- Encourage Client Engagement: Ask open-ended questions to invite feedback on the presented materials. This collaborative approach helps you tailor your designs to meet their preferences, ensuring a more personalized outcome.
Inspiration From Successful Designers

Successful designers know that effective organization can make or break a project. In your interior design business, take a cue from successful designers who utilize clear storage bins and labeled boxes. Tiffany Leigh Design, for instance, switched to clear boxes for project materials, enhancing visibility and organization.
To improve your sample management, categorize your samples by room type or end-use. This approach allows for quick access during client presentations and streamlines project planning. Regularly updating and purging outdated materials is another practice you'll find among established designers. Keeping your sample library relevant guarantees it reflects current trends.
Consider implementing effective organization systems like color-coded bins or categorized racks. These methods are highlighted in various case studies and can greatly boost your productivity by reducing time spent searching for materials.
Don't underestimate the power of peer networking. Many successful designers attend workshops or webinars, sharing best practices in sample management. By learning from their experiences, you can refine your strategies and tools for organizing interior design materials, ultimately leading to a more efficient workflow and successful projects.
Best Practices for Sample Disposal

Maintaining an organized sample library isn't just about keeping things tidy; it's also about knowing when to let go of materials that no longer serve your design goals.
Implementing best practices for sample disposal helps you streamline your organization and keeps your materials library relevant.
Here are three effective strategies for sample disposal:
- Quarterly Reviews: Conduct regular assessments every three months to identify outdated samples. This systematic approach guarantees you're always in tune with your current design offerings.
- Clear Criteria: Establish guidelines for what makes a sample eligible for disposal. Consider aspects like age, condition, and alignment with current trends. This will help maintain a focused inventory.
- Designated Disposal Area: Create a specific bin for outdated samples. This not only facilitates easy organization but also prevents clutter from accumulating in your materials library.
Encourage your team to participate in the disposal process, fostering a culture of organization.
Regularly communicate with vendors to stay updated on discontinued items, guaranteeing your collection remains current.
With these practices in place, you'll keep your materials library efficient and inspiring.
Conclusion
To sum up, organizing your interior design materials can greatly boost your efficiency and creativity. Did you know that designers who maintain a well-organized materials library report a 30% increase in project turnaround time? By implementing effective storage solutions and categorizing your samples, you'll not only enhance your workflow but also impress your clients during presentations. So, take the time to streamline your materials and watch how it transforms your design process for the better!