
The one setting that can ruin every decal is improper blade calibration. If your blade is too deep, it’ll cut too much and ruin your design, causing jagged edges or tearing. Too shallow, and the cut might be incomplete, making weeding a nightmare. Ensuring your blade is correctly calibrated for each material prevents these issues. Keep an eye on this setting, and you’ll consistently produce clean, professional decals—if you continue exploring, you’ll uncover how to master this essential step.
Key Takeaways
- Setting the blade depth too high can cut too deeply, damaging the backing and ruining the decal.
- Insufficient blade pressure causes incomplete cuts, making decals difficult to weed and ruining the design.
- Using a default or incorrect setting without calibration risks jagged edges and poor decal quality.
- Ignoring material-specific adjustments leads to tearing or incomplete cuts, compromising final results.
- Not rechecking settings when switching materials or projects increases the chance of ruining decals.
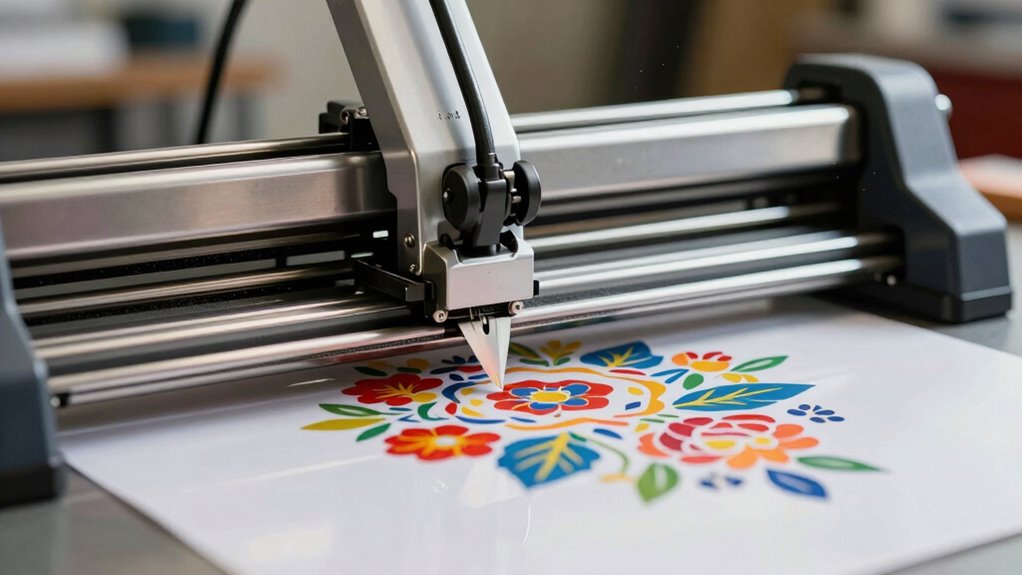
Vinyl cutters are essential tools for anyone looking to create custom designs, decals, and signs with precision. When you’re working on a project, the last thing you want is for a simple setting mistake to ruin your entire decal. One of the most critical factors that can make or break your results is blade calibration. If your blade isn’t properly calibrated, you risk either cutting too deep or not enough. A blade set too deep can cut through the backing material, ruining the design, while an insufficient cut leaves your decal incomplete or difficult to weed. Regularly checking and adjusting your blade calibration ensures you get clean, accurate cuts every time. It’s a straightforward process, but it’s easy to overlook, especially when you’re eager to finish a project. Take the time to calibrate your blade before starting, particularly when switching between different materials, as each one requires a different depth and pressure setting. Proper blade calibration can prevent many common cutting issues and improve overall results.
Material compatibility also plays a vital role in achieving perfect cuts. Different vinyl types—such as adhesive, heat transfer, or specialty textured vinyl—have unique properties that demand specific settings on your cutter. Using the wrong material with incompatible machine settings can result in poor cuts, tearing, or incomplete designs. For example, a thicker or more textured vinyl might need increased blade pressure or a different blade type altogether. Conversely, delicate or thin materials might require a lighter touch to prevent tearing or unwanted cuts. Knowing your material’s compatibility with your cutter helps you set the correct parameters from the start, saving you time and material costs. Many cutters come with recommended settings for various materials, but always test on a small piece first to fine-tune your setup.
Failing to consider blade calibration and material compatibility can lead to frustrating results: jagged edges, incomplete cuts, or damaged material. These issues often stem from neglecting to check or adjust settings properly before starting. It’s tempting to skip these steps when you’re in a hurry, but doing so undermines your entire project. Instead, develop a habit of calibrating your blade regularly, especially when switching materials or after extensive use. Keep a record of the settings that work best for each material type, so you can quickly reference them in future projects. By paying close attention to blade calibration and material compatibility, you ensure every decal turns out sharp, clean, and professional-looking—saving you time, reducing waste, and boosting your confidence in your craft.
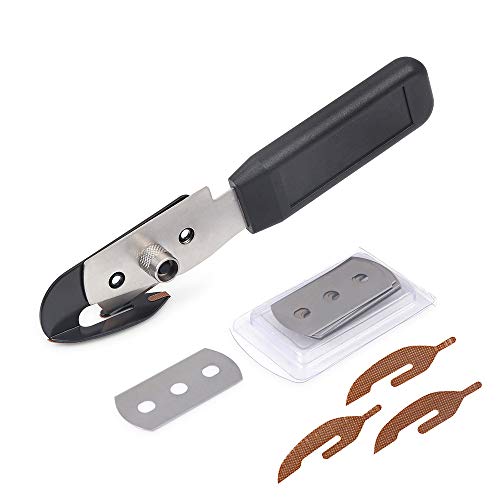
Gomake Vinyl Backing Cutter Bodyguard Vinyl Wrap Cutting Knife, Hidden Blade Wrap Cutter for Car Tinting and Backing Paper with 10 Extra Blades and 3 PTFE Stickers
Vinyl Cutter with PTFE-Coating greatly decreases sticky problem while cutting
As an affiliate, we earn on qualifying purchases.
As an affiliate, we earn on qualifying purchases.
Frequently Asked Questions
Can Vinyl Cutters Cut Materials Other Than Vinyl?
Yes, vinyl cutters can cut materials other than vinyl, but you need to take into account material compatibility. Many models can handle alternative substrates like paper, cardstock, and even thin fabrics, provided you adjust the blade and settings accordingly. Always check your cutter’s specifications and test on small sections first to ensure clean cuts without damaging the material. Properly selecting and adjusting for different substrates guarantees successful cuts across various materials.
What Is the Ideal Blade Pressure for Different Decal Types?
You should set your blade pressure based on decal types. For lightweight, thin decals, use lower blade pressure, around 10-15 grams, to prevent tearing. For thicker or textured decals, increase pressure to 20-30 grams for clean cuts. Always do test cuts first to find the perfect blade pressure for each material. Adjusting blade pressure precisely guarantees your cuts are sharp and prevents ruining your decals.
How Do I Troubleshoot Uneven or Incomplete Cuts?
To troubleshoot uneven or incomplete cuts, first check your blade alignment to make sure it’s straight and secure. Next, examine the material tension; too tight or loose material can cause problems. Adjust the tension if necessary, and re-align the blade if it’s off-center. Also, verify your blade depth and pressure settings to ensure they match your material type. These steps help achieve clean, precise cuts every time.
Which Software Is Best for Designing Decals?
Did you know over 60% of decal creators prefer design software like Adobe Illustrator or CorelDRAW? For decal creation, these programs offer advanced vector tools, precision, and easy export options. Adobe Illustrator provides industry-standard features, while CorelDRAW is user-friendly and cost-effective. Both enable you to craft detailed, professional-quality decals efficiently. Choose based on your skill level and budget, and you’ll create stunning decals every time.
How Often Should Blades Be Replaced for Optimal Performance?
You should replace your blade every 6 to 12 months, depending on your blade’s lifespan and how often you use it. Regularly check for dullness or nicks, which indicate it’s time for substitution. Maintaining proper replacement frequency ensures clean cuts and prevents damage to your decals. Keep an eye on your blade condition, and don’t hesitate to swap it out sooner if you notice decreased performance or uneven cuts.

NAACOO Laminate/Vinyl Floor Cutter, 13” Vinyl Plank Cutter with Wheel – Just 1 Step Meet Angle&Length Cutting, Flooring Tools – Cuts Laminate Floor, Engineer Wood, LVP/T, VCT, SPC, WPC
🏆【NAACOO Laminate Cutter】- Maximum cutting Width – 13 inches, Maximum cutting Thickness – 13 mm. Multi cutting angles…
As an affiliate, we earn on qualifying purchases.
As an affiliate, we earn on qualifying purchases.
Conclusion
Remember that one time you ruined a decal because of a simple setting mistake? It’s like trying to build a house on shaky foundations — no matter how perfect the design, everything falls apart without the right base. The key setting can make or break your project. So, double-check your cutter’s settings before you start. A small tweak can save you hours of frustration and turn a potential disaster into a flawless finish.

VEVOR Vinyl Cutter Machine, Upgraded 28 Inch Paper Feed Cutting Plotter Bundle, Adjustable Force & Speed Vinyl Printer with Powerful Stepper Motors, Signmaster Software Compatible with Windows System
28in Large Cutting Area: Max Paper Feed: 28.3 in / 720 mm; Max Cutter Width: 24.8 in /…
As an affiliate, we earn on qualifying purchases.
As an affiliate, we earn on qualifying purchases.

30 Pack Replacement Blades for Explore Air 2 Vinyl Cutting Blade 45 Degree Cutting Plotter Blades Blades for Maker Expression Vinyl Cutter Machines Deep Cut Blade (Red)
【Compatible】Our vinyl cutting blades are compatible with Explore Air 2 Vinly Cutter, Explore Air, Maker and Expression. Replace…
As an affiliate, we earn on qualifying purchases.
As an affiliate, we earn on qualifying purchases.