To create stunning interior designs in Photoshop, start by setting up your document with a high-quality photo of the space. Import your design elements, like furniture and accessories, and organize them on separate layers for easy manipulation. Use the Paint Bucket Tool for color fills and add textures for depth. Incorporate shadows and highlights using the Brush and Dodge tools to enhance realism. Label your design elements with the Text Tool for clarity. Finally, review and export your work in the appropriate format to share. Keep going, and there's even more to reveal in your design process! For even more stunning interior designs in Photoshop, consider using the Pen Tool for precise selections and the Transform options for adjusting scale and perspective. Remember to experiment with layer blending modes and adjustment layers to achieve the desired mood and atmosphere. These tips for interior designing in Photoshop will elevate your skills and take your designs to the next level. Keep practicing and exploring new techniques to continuously improve your craft.
Key Takeaways
- Set up your document in Photoshop with high-quality images and a resolution of at least 300 DPI for optimal design output.
- Organize decor elements into separate layers for easy manipulation and apply adjustment layers for non-destructive editing.
- Utilize shadows and highlights effectively to enhance depth and realism in your interior design mockup.
- Incorporate text annotations to label design elements, using complementary font styles and colors for clarity.
- Review and adjust layout, colors, and textures to ensure aesthetic coherence before exporting your final design.
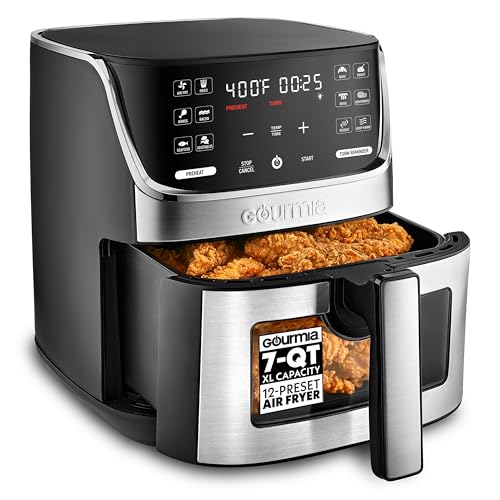
Gourmia Air Fryer - 7 Qt Large Capacity with LED Display, 12 One-Touch Presets, FryForce 360° Technology, Nonstick Dishwasher-Safe Basket & Crisper Tray, Stainless Steel
- Large 7 Qt Capacity: Ideal for family-sized meals
- Digital LED Touch Display: Easy to control with precise settings
- 12 One-Touch Presets: Quickly cook a variety of foods
As an affiliate, we earn on qualifying purchases.
Setting Up Your Document

To kick off your interior design project in Photoshop, you'll want to start by setting up your document properly. First, capture a high-quality photo of the empty space you want to design. Make sure you have ideal lighting and minimal distractions in the shot.
Once you've got the perfect image, open Adobe Photoshop and create a new document with dimensions set to 1920 x 1080 pixels. This size is perfect for digital presentations.
Next, import the captured apartment photo into your new document by dragging it directly onto the canvas. This step is essential, as it provides the foundation for your design work.
Don't forget to set the resolution of your document to at least 300 DPI (dots per inch) to guarantee you achieve high-quality output suitable for print or detailed presentations.
As you begin designing, make a habit of using the 'Save As' function to regularly save your work in a format like .PSD. This preserves layer information, allowing for easy future edits.

12QT Large Double Air Fryer, Family-Size Dual Airfryer with 2 Baskets, SyncHeat Even Heating, Stacked Compact Design, Smart Finish & Match Cook, PFAS-Free Nonstick, Dishwasher-Safe, Black
- Dual Basket Space-Saving Design: Supports simultaneous cooking without flavor transfer
- Large 12QT Capacity: Ideal for families and meal prep
- Stacked Compact Structure: Maximizes capacity and saves counter space
As an affiliate, we earn on qualifying purchases.
Importing and Organizing Elements

Importing and organizing elements is essential for bringing your interior design vision to life in Photoshop. Start by capturing high-quality photographs of the empty space you want to design, ensuring they're staged correctly to reflect your desired layout.
Next, gather images of decor elements like furniture and accessories from online stores; take screenshots or save those images for editing.
Once you've collected your elements, create separate document tabs in Photoshop for each item. Use the Quick Selection tool to isolate and mask these items efficiently. This technique simplifies their integration into your main design.
After isolating the decor items, drag their files into your main document containing the apartment photo. Each item will appear as a new layer, making it easier to organize and adjust.
Utilize the Layers tab to manage the arrangement and visibility of each decor piece. This functionality allows you to experiment with positioning and layering, helping you achieve a cohesive design.

Cosori TurboBlaze Air Fryer 6 Qt, PFAS-Free Ceramic Coating, Dark Gray
- TurboBlaze Technology: Powerful 3600 rpm fan and high temperatures
- Even Cooking System: 5-fan system with precise temperature control
- PFAS-Free Ceramic Coating: Durable, heat-resistant, nonstick ceramic basket
As an affiliate, we earn on qualifying purchases.
Utilizing Layers Effectively

Layers act as the backbone of your interior design project in Photoshop, enabling you to manipulate each element with precision. To create a seamless design, you should place each decor item or design element on its own layer. This way, you can easily show or hide items and adjust their positions independently, ensuring a cohesive look throughout your project.
Utilizing the Layers panel helps you stay organized, while layer grouping keeps similar items together, streamlining your workflow. This organization is essential, especially when you're working on complex designs with multiple components.
Don't forget to take advantage of adjustment layers. They allow you to apply effects like color correction or brightness changes non-destructively, preserving your original images while giving you flexibility in editing.
Additionally, consider using layer styles, such as drop shadows and bevels, to add depth and realism to your design. These effects enhance the overall presentation of your interior mockup, making it more visually appealing.

Cuisinart Air Fryer, Glass Basket & ClearView Window, 5 Functions, 4 Qt
- Real-Time Cooking Visibility: Glass basket with clear window and interior light
- Versatile Prep and Serve: Prepares, cooks, serves, and stores with lid
- Five Cooking Functions: Air Fry, Bake, Broil, Recrisp, Keep Warm
As an affiliate, we earn on qualifying purchases.
Applying Color and Texture

When it comes to interior design in Photoshop, applying color and texture effectively can dramatically transform your mockup. Start by using the Paint Bucket Tool to fill walls or elements with solid colors, allowing you to experiment with various color schemes quickly. For a more tactile feel, import texture overlays like fabric or wallpaper, adjusting the layer settings for realism.
To guarantee textures align with surfaces, employ the Distort Transform Tool for accurate perspective adjustments. Color correction techniques can enhance vibrancy and accuracy, making sure your interior reflects the desired mood. Layering multiple textures and colors creates depth; don't forget to tweak opacity and blending modes for a harmonious look.
Here's a quick reference table to guide your choices:
| Color Application | Texture Options | Adjustment Techniques |
|---|---|---|
| Solid colors with Paint Bucket | Fabric patterns | Distort Transform Tool |
| Gradient fills | Wallpaper designs | Layer settings |
| Color overlays | Nature-inspired textures | Opacity adjustments |
Adding Shadows and Highlights

To bring your interior design to life, adding shadows and highlights is essential.
You'll want to explore various techniques for creating realistic light effects and layering them to add depth.
Importance of Shadows
Shadows play an integral role in creating depth and realism in your interior design mockups. They enhance the perception of space and dimension, making your designs feel more tangible. When you incorporate shadows, you help define the contours of objects, allowing them to appear three-dimensional and grounded within the scene.
To achieve consistency and believability, confirm the direction and intensity of shadows match the light source in your image. This attention to detail is vital in photo editing, as it contributes to the overall realism of your design. Utilizing Photoshop's layer styles, such as drop shadows or inner shadows, allows you to quickly add depth to objects without extensive manual editing, streamlining your workflow.
Even subtle adjustments to shadows can greatly impact the overall mood of your design. They influence how colors and textures are perceived by the viewer, enhancing the emotional connection to the space.
Techniques for Highlights
Creating a realistic interior design in Photoshop involves not just managing shadows but also skillfully adding highlights. To achieve this, start by using the Brush tool with a soft edge and low opacity. Gradually build highlights on surfaces, mimicking natural light reflections on materials like wood or fabric. This will enhance the realism of your design ideas.
Next, utilize the Layer Styles feature to create drop shadows. Adjust the distance, size, and opacity to simulate how objects cast shadows in their environment.
For more control over light and dark areas, use the Dodge tool to lighten where light naturally hits, and the Burn tool to darken areas, enhancing depth and dimension.
Experiment with blending modes like Overlay or Soft Light on duplicated layers filled with white or black. This creates dynamic highlights and shadows that interact beautifully with your underlying textures.
Additionally, incorporate gradient fills using the Gradient tool to represent light shifts, allowing for smooth changes in tone that convey depth and space in your interior designs.
Layering for Depth
How can you effectively layer shadows and highlights to add depth to your interior design? Mastering this technique is essential for interior designers who want to create a realistic and inviting space. Here's how to do it:
1. Utilize Layer Functionality: Separate shadows and highlights on different layers. This makes it easier to adjust each element without affecting the whole design.
Additionally, consider the importance of flexibility in scheduling when planning your design sessions to guarantee ample time for refinement.
2. Apply Drop Shadows: Use the "Drop Shadow" layer style for realistic shadows beneath objects. Adjust the angle, distance, and opacity to align with your light source for a natural look.
3. Manual Painting with the Brush Tool: Employ the "Brush Tool" with a soft edge to paint highlights and shadows. Pick colors that complement the original tones to maintain cohesion in your design.
Experiment with layer opacity and blending modes like "Multiply" for shadows and "Overlay" for highlights to create a dynamic interplay of light and dark.
Regularly group your layers and use adjustment layers such as "Curves" or "Levels" to refine the overall lighting. This control guarantees a polished final presentation that captivates your audience.
Incorporating Text Annotations

Adding text annotations to your interior design mockup can greatly enhance clarity and provide essential context. Using the Text Tool in Photoshop, you can easily label different elements, ensuring viewers grasp your design intent.
Make sure to choose appropriate font styles and sizes that complement your overall design aesthetic without overwhelming it. To improve visibility, utilize layer styles like drop shadows or strokes, which help your annotations stand out against varied backgrounds.
Position your text annotations strategically near relevant design elements to provide context and explanations without obstructing key visuals. This way, your viewers can quickly understand the specifics of your design.
Consider incorporating color-coded text or icons to differentiate various elements, such as materials, furniture types, or functional areas. This technique aids in quick comprehension for your audience, making it easier for them to navigate your design.
Finalizing Your Design

As you finalize your design, take a moment to review your layout for visual appeal and functionality.
Make any necessary adjustments to enhance clarity before exporting your images using the 'Save As' function in your preferred format.
Don't forget to check that your artboard is selected for the best quality when sharing or printing.
Exporting Final Images
Once you've perfected your interior design in Photoshop, it's time to finalize your work by exporting your images. Start by heading to the "File" menu and selecting "Save As." Choose your desired file format, like .jpg or .png, to guarantee high-quality output for presentations.
Before you hit export, make sure your artboard is selected if you're using Illustrator; this will determine the area saved in your final images.
Here are three key steps to follow for successful exporting final images:
- Resolution Settings: Adjust your resolution to at least 300 DPI for print-quality images or 72 DPI for web use. This guarantees your designs look sharp in their intended medium.
- Batch Processing: Use the "Export As" option to easily create multiple formats from a single design file. This is particularly useful for different applications, such as print or online sharing.
- Last-Minute Adjustments: Review your design for visual appeal and functional arrangement. Make any final tweaks to layers or elements before exporting.
Following these steps will help you present your work professionally and effectively.
Review Design Adjustments
Before finalizing your interior design in Photoshop, it is essential to review your design adjustments carefully. Start by examining the arrangement and layering of elements to guarantee each item complements the overall aesthetic and functional goals of the space. Make necessary adjustments to colors, textures, and item placements to develop your design into a cohesive look before you finalize it.
Here's a quick checklist to help you in your review process:
| Aspect | Action Required |
|---|---|
| Arrangement | Check for balance and flow |
| Colors | Adjust for harmony |
| Textures | Confirm variety and comfort |
| Item Placement | Verify functional layout |
| Final Inspection | Look for alignment and clarity |
Once you've made adjustments, conduct a final visual inspection of your design. Check for alignment, clarity, and any elements needing further refinement or removal. Finally, use the export function in Photoshop to save your completed design as a .jpg or .png file, guaranteeing high-quality output that accurately reflects your design intentions.
Exporting and Sharing Your Work

Exporting your completed interior design project in Photoshop is an essential step for sharing your creative vision with others. If you don't export correctly, you can't make your designs accessible to potential clients or collaborators.
Start by moving to the "File" menu and selecting "Export." You can choose "Quick Export as PNG" for quick sharing, or "Export As" to customize settings.
Here are three key points to take into account when exporting your work:
- File Format: Use JPEG for smaller file sizes suitable for online sharing, and PNG for high-quality images that maintain transparency.
- Resolution: Confirm you select the right resolution—72 DPI for web use and 300 DPI for print—to match your design's intended purpose.
- Save As: Always use the "Save As" function to create copies in different formats, while preserving your original PSD file for future edits.
After exporting, share your designs on social media or design portfolio websites. This enhances your visibility and engagement with your audience, helping you grow as a designer.
Conclusion
Now that you've mastered the essentials of creating interior designs in Photoshop, you're ready to let your creativity shine. Picture your designs like a classic vinyl record—timeless and full of personality. With your organized layers, vibrant colors, and thoughtful details, your projects will impress clients and friends alike. So, grab your digital paintbrush and start transforming spaces. Remember, the only limit is your imagination, so don't be afraid to experiment and make your designs uniquely yours!