To take great interior design photos, start by maximizing natural light—open curtains and shoot during the golden hour for soft, inviting tones. Use a quality DSLR or mirrorless camera with a tripod and wide-angle lens to capture more of the space. Pay attention to composition by applying the rule of thirds and maintaining straight lines for a polished look. Declutter the scene to keep the focus on design elements. Finally, experiment with different angles and editing techniques to find what works best for you. Stick around to uncover more tips that can elevate your photography skills! When photographing interiors, it’s also important to consider the specific interior design styles present in the space. Whether it’s minimalist, industrial, or traditional, understanding the unique features and characteristics of each style can help you highlight them in your photos. Pay attention to the color scheme, furniture, and decorative elements that define the style, and showcase them in your photography to capture the essence of the design. By doing so, you can create images that truly reflect the personality and atmosphere of the interior.
Key Takeaways
- Maximize natural light by shooting during early morning or late afternoon for soft, diffused illumination.
- Use a quality DSLR or mirrorless camera with a wide-angle lens to capture more of the space.
- Apply the rule of thirds and leading lines to create balanced and engaging compositions.
- Declutter the scene and arrange furniture thoughtfully to enhance visual appeal and functionality.
- Edit photos in RAW format for better quality adjustments and post-processing flexibility.
Harnessing Natural Light
To capture stunning interior design photos, harnessing natural light is essential. Start by maximizing the natural light in your space. Open curtains and blinds to let in soft daylight, which will illuminate your interiors beautifully, avoiding harsh shadows or unwanted yellow tones that artificial lights can create.
The best times for shooting are early morning or late afternoon, when sunlight is softer and more diffused. This timing helps you dodge the intense glare of midday sun. Overcast days can also be your best friend; the cloud cover provides evenly distributed, soft light that minimizes shadows and keeps color accuracy intact.
Experimenting with different angles and positions relative to windows can dramatically enhance how natural light interacts with the space. This exploration creates a more inviting atmosphere in your photos.
Don't forget about reflectors! They can effectively bounce natural light into darker corners, brightening the overall image without the need for artificial lighting sources.
Choosing Optimal Weather Conditions

When planning your interior design photo shoots, choosing the right weather conditions can make all the difference. Ideally, you want to shoot in natural light, as it brings out the true colors and details of your space.
Overcast days are particularly beneficial, providing soft, diffused lighting that minimizes harsh shadows and enhances the overall quality of your photographs. This kind of lighting helps maintain color accuracy and clarity in your images.
Another excellent time to capture stunning interiors is during the golden hour, which occurs early in the morning or late in the afternoon. The warm light during this time can add an inviting glow to your spaces, making them feel more welcoming.
On the other hand, avoid shooting in the harsh midday sun, as it can create blown-out areas and strong contrasts that detract from the space's intricate details.
Essential Camera Equipment

To capture stunning interior design photos, you'll need the right camera gear.
Start with a quality DSLR or mirrorless camera, and don't forget essential accessories like a tripod and wide-angle lenses.
Investing in these tools will elevate your photography and help you achieve the best results in any setting.
Camera Types Overview
In interior design photography, choosing the right camera equipment is vital for capturing stunning images that reflect the beauty of a space. DSLR and mirrorless cameras are excellent options due to their superior image quality and versatility. Their ability to change lenses allows you to capture various angles and perspectives, essential for showcasing interiors effectively.
Wide-angle lenses, typically ranging from 16-24mm, are indispensable for this type of photography. They let you capture more of the space in a single shot, offering a thorough view without distortion.
To guarantee sharp images, especially in low light or at slower shutter speeds, using a tripod is a must. It stabilizes the camera, which helps achieve clear, professional results.
If you're looking for a more convenient option, high-quality smartphone cameras can still deliver impressive results. With features like HDR and portrait mode, they're great for quick shots when a dedicated camera isn't available.
Essential Accessories List
Having the right accessories can greatly enhance your interior design photography experience. Start by investing in a quality DSLR or mirrorless camera with manual controls. This gives you the flexibility and improved image quality you need for various lighting conditions.
A tripod is essential; it guarantees stability and consistency, especially during long exposure shots or low-light situations, eliminating blurriness.
For capturing more of the interior space, opt for a wide-angle lens, typically in the range of 22-24 mm. This allows you to showcase the room's full character without excessive distortion.
Incorporating external flashes or reflectors can also enhance lighting in darker areas, but remember that natural light should remain your primary source for authenticity.
Composition Techniques

When capturing interior design photos, composition techniques play an essential role in showcasing the space effectively. By applying these methods, you can create visually stunning images that draw viewers in.
- Rule of Thirds: Mentally divide your image into a 3×3 grid. Position key elements along the lines or at their intersections to achieve a balanced composition that feels natural.
- Leading Lines: Use furniture edges or architectural features to guide the viewer's eye towards focal points in the space. This adds depth and interest to your photos.
- Negative Space: Incorporate negative space around key subjects to provide breathing room. This emphasizes the main elements and creates a more inviting image.
- Vertical Lines: Guarantee that walls, doors, and windows appear straight in your frame. Maintaining vertical lines helps avoid distortion, enhancing the professionalism of your shots.
Experiment with angles, like shooting from slightly above belly button height, to capture the grandeur of the space.
Maintaining Straight Lines

To maintain straight lines in your interior design photos, start by visualizing a grid using your camera's grid lines feature.
This helps you align elements properly and keeps everything balanced.
Don't forget to check the level lines; a straight frame is essential for capturing the true essence of the space.
Visualizing a Grid
Visualizing a grid is essential for maintaining straight lines in your interior design photos, ensuring a polished and professional look. By aligning shelves, walls, and artworks, you can achieve a visually stunning result.
Here are a few tips to help you embrace this technique:
- Use Grid Lines: Activate grid lines in your camera or phone settings. This simple tool helps you position key elements according to the rule of thirds, enhancing composition balance.
- Check Angles Regularly: While shooting, keep an eye on your angles to maintain visual clarity and prevent distortion, which is vital for good photographs.
- Utilize a Tripod: A tripod stabilizes your camera and assists in keeping lines straight, especially in low-light situations requiring longer exposure times.
- Maintain Perspective: Consistently visualizing a grid improves the flow of your images, making them more engaging for viewers.
Level Lines Importance
Straight lines play an essential role in achieving a polished look in your interior design photos. Distorted angles can create feelings of vertigo, distracting from your design's appeal. Using a tripod and grid lines guarantees that vertical and horizontal elements remain aligned, providing a clear and balanced composition.
Here's a quick reference table to help you maintain straight lines:
| Technique | Description |
|---|---|
| Use a Tripod | Stabilizes your camera for sharper images. |
| Check Framing | Regularly assess shelves, walls, and artwork. |
| Employ Leading Lines | Guide the viewer's gaze through the composition. |
| Post-Processing | Correct minor misalignments for a professional finish. |
| Maintain Order | Enhance harmony in your images through straight lines. |
Regularly checking your framing helps reinforce order and harmony, elevating your interior design photography. Remember, straight lines enhance visual clarity, making your photos more appealing. Don't hesitate to use post-processing tools to fix any minor misalignments, guaranteeing that all lines appear perfect and enhancing the overall quality of your images.
Creating a Focal Point
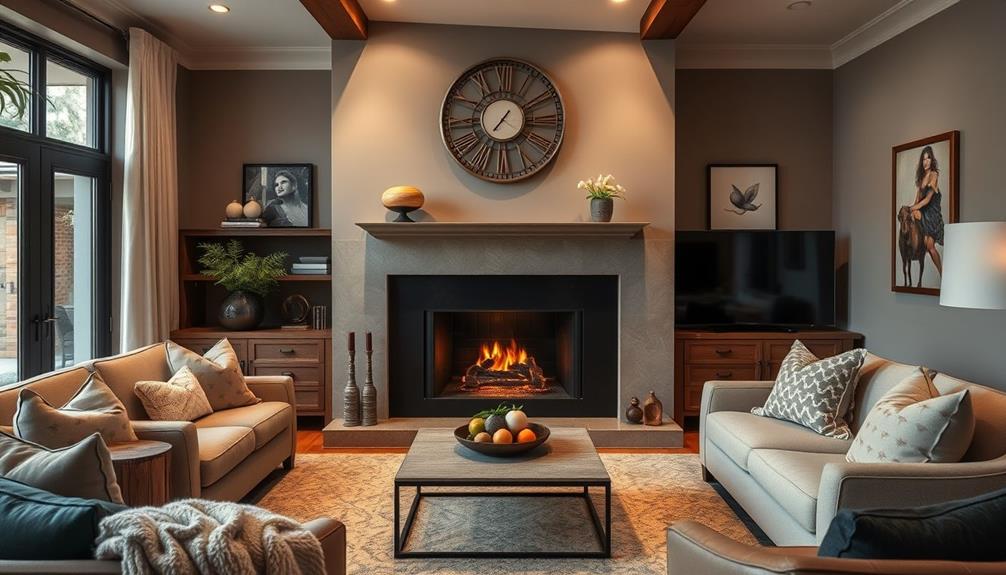
A strong focal point is essential for engaging interior design photos. It guides viewer attention and evokes interest, making your images more enchanting. To create an effective focal point, consider these key strategies:
- Choose a Statement Piece: Whether it's a unique piece of furniture or striking artwork, select a subject that stands out. For instance, using cozy teenage girl room colors can enhance the visual appeal of your focal point.
- Position and Lighting: Make sure your focal point is prominently placed within the frame and well-lit. Avoid letting other elements overshadow it; good lighting highlights its importance.
- Use Composition Techniques: Apply the rule of thirds by placing your focal point off-center. This approach creates a more dynamic and visually appealing image.
- Eliminate Distractions: Declutter the surrounding area. Remove any objects that might detract from the main subject, ensuring your focal point shines.
Incorporating leading lines or framing elements can further draw the viewer's eye to your focal point, enhancing its prominence in your interior photos.
Preparing the Scene

Before you start snapping photos, make sure to declutter the space by removing any distracting items.
Arrange the furniture thoughtfully to create a balanced layout that enhances the overall appeal.
This careful preparation will set the stage for stunning interior design shots.
Decluttering for Visual Appeal
Creating a visually stunning interior design photo starts with a clean slate. Decluttering your space is essential for enhancing the visual appeal of your design. By removing distractions and personal items, you direct the viewer's attention to the key design elements that make your space special.
Here are four steps to achieve that photogenic look:
- Clear Surfaces: Guarantee countertops, tables, and shelves are free of unnecessary items. This creates a more inviting backdrop.
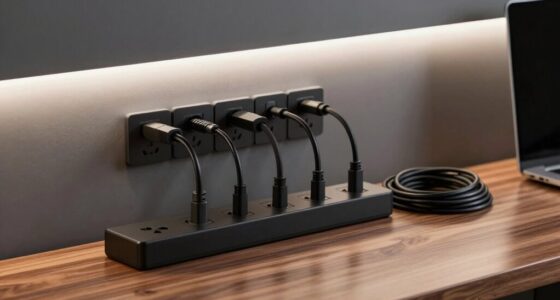
- Tidy Cables: Organize and hide any visible cords to maintain a clean aesthetic and avoid distractions in your shots.
- Limit Accessories: Choose a few curated accessories, like plants or art pieces, to add character without overwhelming the scene.
- Spotless Spaces: Wipe down surfaces to eliminate dust and smudges, guaranteeing a polished, professional finish.
Thoughtful Furniture Arrangement
Once your space is decluttered, it's time to contemplate how the furniture is arranged. Thoughtful furniture arrangement can transform your interior design, enhancing both function and aesthetics.
Start by creating clear pathways to encourage flow, ensuring your layout is easy to navigate.
Use the rule of thirds to position significant elements, like sofas or coffee tables, off-center for a more dynamic composition. This approach helps draw the eye and creates a balanced look.
Incorporate negative space by intentionally leaving areas empty; this highlights key furnishings and adds visual interest.
Next, focus on creating focal points. Position statement pieces—like vibrant artwork or unique furniture—strategically to engage viewers. This can serve as the centerpiece of your composition, guiding the viewer's gaze.
Editing Philosophy

When it comes to editing interior design photos, embracing a minimal editing philosophy can really elevate your work. As a professional photographer, you want your images to look authentic and true to the space.
Focus on capturing the scene accurately in-camera, which reduces reliance on heavy post-processing. Trust your initial shot!
Here are four key points to take into account:
- Prioritize Editing in RAW: Using Camera RAW retains more data, allowing for better adjustments in exposure and white balance.
- Enhance, Don't Overhaul: Make minor adjustments to brightness, contrast, and sharpness to enhance clarity without losing the natural look of the image.
- Aim for Consistency: A consistent editing style across your portfolio strengthens your brand identity and guarantees visual coherence.
- Celebrate Authenticity: Heavy editing can detract from the genuine representation of the interior design and the atmosphere of the space.
Encouraging Experimentation

Experimentation is key to mastering interior design photography. Embrace trial and error by experimenting with different camera angles and settings. You'll discover what truly captures the essence of a space.
Try shooting at various times of day to see how natural light alters the mood and tone of your shots. This exploration can lead to unique and enchanting results.
Encourage your creativity by testing unconventional compositions. Incorporating reflections or framing elements from unexpected perspectives can yield stunning images that stand out.
As you experiment, make sure to document your findings and the corresponding outcomes. This personal reference guide will be invaluable in refining your photography skills over time.
Don't shy away from sharing your discoveries with fellow photographers or on social media. Gaining feedback from others can inspire you and foster a sense of community.
Engaging with others who share your passion for interior design photography will enhance your learning experience and motivate you to keep experimenting.
Engaging With Your Audience

Capturing stunning interior design photos is just the beginning; connecting with your audience is what truly brings your work to life. To engage effectively, consider these strategies:
- Share behind-the-scenes content that reveals your creative process, allowing followers to feel personally invested in your journey. This can be particularly effective, as it mirrors the way friendships are revived and strengthened through shared experiences and authenticity, similar to reviving old friendships.
- Craft engaging captions that tell compelling stories about your design inspirations or the challenges you faced, enhancing the emotional connection with your audience.
- Utilize strategic hashtags related to interior design to increase your visibility, helping new followers discover your work and join the conversation.
- Encourage audience interaction by asking questions about their design preferences or what they'd like to see next. This invites dialogue and makes your audience feel valued.
Lastly, consider collaboration with other designers and brands. Tagging them in your posts can lead to cross-promotion, boosting engagement and expanding your reach.
When you foster genuine connections, your audience becomes more than just viewers; they become part of your design story, enthusiastic to share in your successes and inspirations.
Conclusion
In interior design photography, you'll capture beauty by harnessing natural light, choosing the right weather, and using essential equipment. You'll create stunning compositions, maintain straight lines, and prepare each scene meticulously. You'll edit thoughtfully and encourage experimentation. Most importantly, you'll engage with your audience, sharing your vision and inviting feedback. By following these steps, you won't just take photos; you'll tell a story, evoke emotions, and inspire others to see the beauty in design.